Interior designer Liz Kerby, of LizzieKandCo, says people often underestimate bathroom renovations. “It’s the trickiest room in the house. They might be small, but they’re high-use areas and a lot happens behind the scenes. The process of creating bathrooms involves many different trades which all have to be in there one at a time,” she says.
The list of tradies that have the potential to get involved is extensive – builders, plumbers, waterproofers, electricians, tilers, painters, shower installers, cabinetmakers and stone installers – and each needs to be managed to minimise delays.
OneRoof spoke to Kerby and other renovation and interior design experts to find out how to pull off a successful bathroom renovation.
Good help is important to find
Start your property search
With a lot of unseen elements like pipework and waterproofing that cost a lot of money – and can cost even more if they’re not done properly – you don’t want to make mistakes. Set realistic expectations about what you can and cannot afford, says Shane, and be very clear about that number before you start.
“Some people are enlightened enough to realise they can’t necessarily do a renovation themselves,” Kerby says. “It might be tempting to have a go at the plumbing or tiling, but save yourself a lot of heartache and call in the experts from the start. Remember, they work better as a team.”
Essential to a smooth process is a really good plan with scale drawings and elevations. It needs to show everything from the positioning of the electrical plugs to the shower door width, especially if you’re going to reconfigure the layout. A good designer can provide one for you.

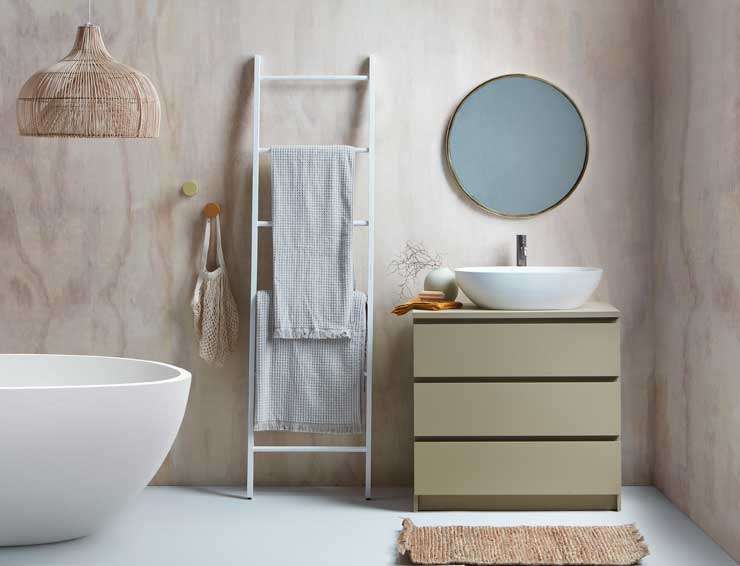
This fresh bathroom manages to take the essence of trendy Scandi cool and blend it with a distinctly local natural style. Photo / Wendy Fenwick
Kerby recommends employing a builder who specialises in smaller projects rather than entire houses. To simplify things, they can coordinate all the other trades to work to the same plan. There are many layers within the bathroom process and everything must be done to specific regulations. With a builder managing the project, you’ll be able to avoid missing these crucial steps.
Create a cohesive look
Once you have a plan, you can decide on the style you’re after with the finishes, colours, fittings and accessories. Spend time with your designer, says Shane George, of Kitchens by Design. “Although it’s worth starting with catalogues, bring product home with you or go to the showroom to get a good feel for what you buy. If you find you don’t like the shape of a vanity, it might be too late once it’s on site.”
Make sure your fixture choices marry with the rest of the house for a cohesive scheme. A plumbing merchant can guide you and put cost-effective packages together.
While pricing ranges wildly when it comes to bathroom finishes, Suzanne recommends that you always choose the best you can afford. Avoid cabinetry made from MDF that turns to cornflakes when it gets wet, and pick good quality tapware that won’t corrode or leak in a few years’ time.
“Whatever you do, don’t skimp on quality,” agrees Kerby, as doing so may come back to bite you. “Buy locally-made cabinets with good metal hinges and hardware.”
To save time and money, don’t use tiles on floors as that requires waterproofing. And adhering to the existing layout also saves money on building work.
Add a little eye candy
To really knock the renovation out of the park, George suggests you find a focal point that you are drawn to when you walk into the room. “Make a feature with interesting materials, textures or colour that give some real oomph to the space. You can do this with different tapware. Some of the aged iron, bronzes and rose golds are just beautiful. Budget comes into it, but if you just choose interesting tapware that will work for you.”
Creating a new bathroom can be tedious and expensive, but to make it as pain-free as possible, enjoy the planning phase at the beginning of the year, says Kerby. “You definitely don’t want to do it before Christmas when everyone’s busy which is a nightmare. Relax over summer, come back from holiday, do the plan, then get going before winter.”

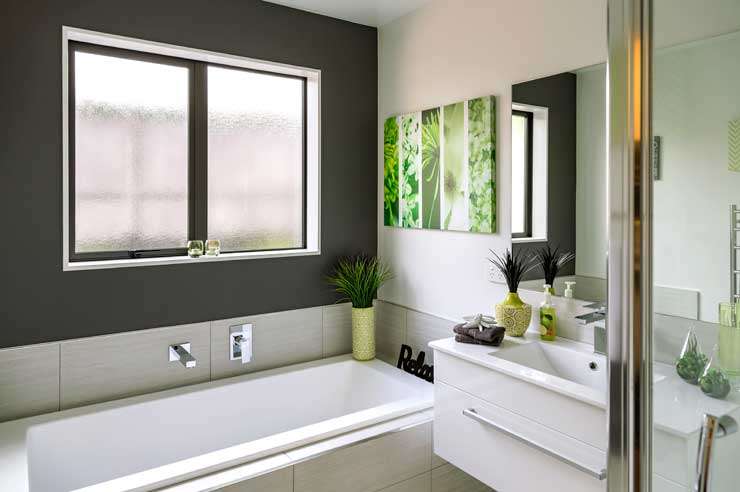
The dark feature wall in this bathroom in Resene Half Fuscous Grey visually recedes from the rest of the walls. Photo / Bryce Carleton
Suzanne Allen, of Suzanne Allen Design, adds: “If you’re doing a complete renovation, including demolishing the old bathroom and changing the electrical and plumbing services, allow at least four to six weeks. Then there are building inspections required to obtain consents, which lengthens the process even further.
“If it’s just a makeover, such as replacing the vanity, toilet, plumbing fittings and some tiling and not moving anything, then allow a couple of weeks.”
Be brave with colour
If you’d like to dabble in a bold or moody look, bathrooms and ensuites are the ideal place to try out dark or vibrant paint colours or wallpapers. If you’re investing the time, money and effort to do a complete renovation, why not make it one to remember? Try something courageous and it’ll surely be the talk of every guest you host.
Contrary to the popular belief that they make spaces feel smaller, fully saturated shades are amazing for bathrooms. Try dramatic dark blues like Resene King Tide, Resene Indian Ink or Resene Twilight Zone or near black greys like Resene Suits or Resene Porter.
While watery shades can seem like a natural fit for a bathroom, deep emerald greens like Resene Mother Nature, Resene Family Tree or Resene Atlas and rich terracottas like Resene Raging Bull, Resene Sunbaked or Resene Moccasin are a great bold alternatives.
And don’t forget about the ‘fifth wall’. The ceiling is a perfect place to use bold colours instead of the typical white.
Spatial considerations
• Spatial relationships between the toilet, vanity, shower and storage are important. It’s not ideal to have a loo in full view of the door. They must be a minimum 400mm from any wall or vanity.
• Floating vanities work well in small spaces giving the allusion of more room. Consider a cavity slider rather than a hinged door in the entry and even across the shower opening. They can save a lot of space.
• Think about where the toilet roll holder will be positioned so you don’t have to do awkward yoga stretches to reach it. Plan for a decent sized towel rail. If the budget is limited, singles look great, and low voltage options are available if they need to be close to the shower or bath.
• Always allow a shower recess for storing shampoo bottles and so on. That needs to be in the elevation plan so the builder can make the recess in the wall before the tiling happens.
• Don’t add a freestanding bath if it’s not practical.
Top tips to take away
• Don’t rush the design phase and be sure to get s professional designer involved, especially if you’re changing the layout
• Always use registered tradespeople, especially when it comes to plumbing and electrical work
• If you want to invest in something special, be sure to check on lead times while you’re putting your plan together. Some of the nicer products may be on in-dent and have delivery times of a few months – likewise for custom-vanities that may take months to build.
• Allow plenty of storage – always plan for more than you think you’ll need
• Consider moving things from their original position if it makes for better flow. Plumbing and drainage can often be moved within a few metres without having to get a council permit.
• If you want the room to feel bigger, try hanging a large mirror over the vanity. Not only will this create the illusion of more space, it will bounce light around the room. Windows can help to do the same thing.
• Use light to mid-tones on the floor to open up the space visually and make it seem larger. If you’re opting for bamboo or timber over tile, try Resene Colorwood Whitewash or Resene Colorwood Natural to let the natural woodgrain steal the show.
- For more colour, paint and wallpaper ideas and inspiration see the latest looks here.
This content has been created in partnership with Resene.


