Redecorating your walls is one thing, but there are plenty of other surfaces you can paint to instantly invigorate your home without blowing the budget. We can think of a few.
Floors
Are you someone who suspects painting is kind of complicated and best left to the professionals? You’re about to join the ranks of those who know it’s not hard and use it to turn their abodes into something to write home about, starting from the ground up. Compared to the cost of laying new flooring, painting your floors is incredibly budget-friendly. And paint is not just for hardwood floors either – concrete, vinyl, lino and tiles all stand to benefit from its beautifying potential. The only thing you must keep in mind, says Resene paint expert Jay Sharples, is that “once you paint, it’ll be hard, if not impossible, to revert your floors back to the way they were”.
Decision made to upgrade, whatever your flooring material, Jay says it should be thoroughly washed and dried before you begin, then the recommended Resene primer applied to ensure you get the best possible adhesion of paint. Visit your local Resene ColorShop for free advice on the products and equipment you need to get a great result.
Start your property search
To revitalise a past-its-best timber floor, Jay recommends giving it a light sand before applying your choice of Resene topcoat. Or, for a natural stained finish, opt for a Resene Colorwood stain or glossy Resene Enamacryl waterborne enamel. For extra protection in high-traffic areas, finish with a couple of coats of Resene Qristal ClearFloor.
For concrete floors, Jay advises filling crevices less than 1mm deep with Resene Brushable Crack Filler. Prime with Resene ConcreteSeal 3 in 1, then using a roller to apply two coats of Resene Walk-on tinted with your chosen Resene colour, allowing two hours between coats.
Tired vinyl and lino flooring can seem insurmountably unfashionable without a wad of cash to throw at them, but, actually, they can be easily involved in a cover-up. Begin by applying Resene Waterborne Smooth Surface Sealer, letting it cure for at least 48 hours. Cover with two coats of Resene Walk-on tinted with your chosen colour and your more stylish future is assured. Test the paint finish on your vinyl and lino flooring so it’s suitable before doing the whole floor.
As for tiles, Resene has a specific system for painting over floor and wall tiles but do note that painted tiles won’t replicate the original tile finish. Thoroughly clean your tiles before applying a coat of Resene Waterborne Smooth Surface Sealer. Once dry, use a brush to apply two coats of Resene Lustacryl tinted to your chosen colour.

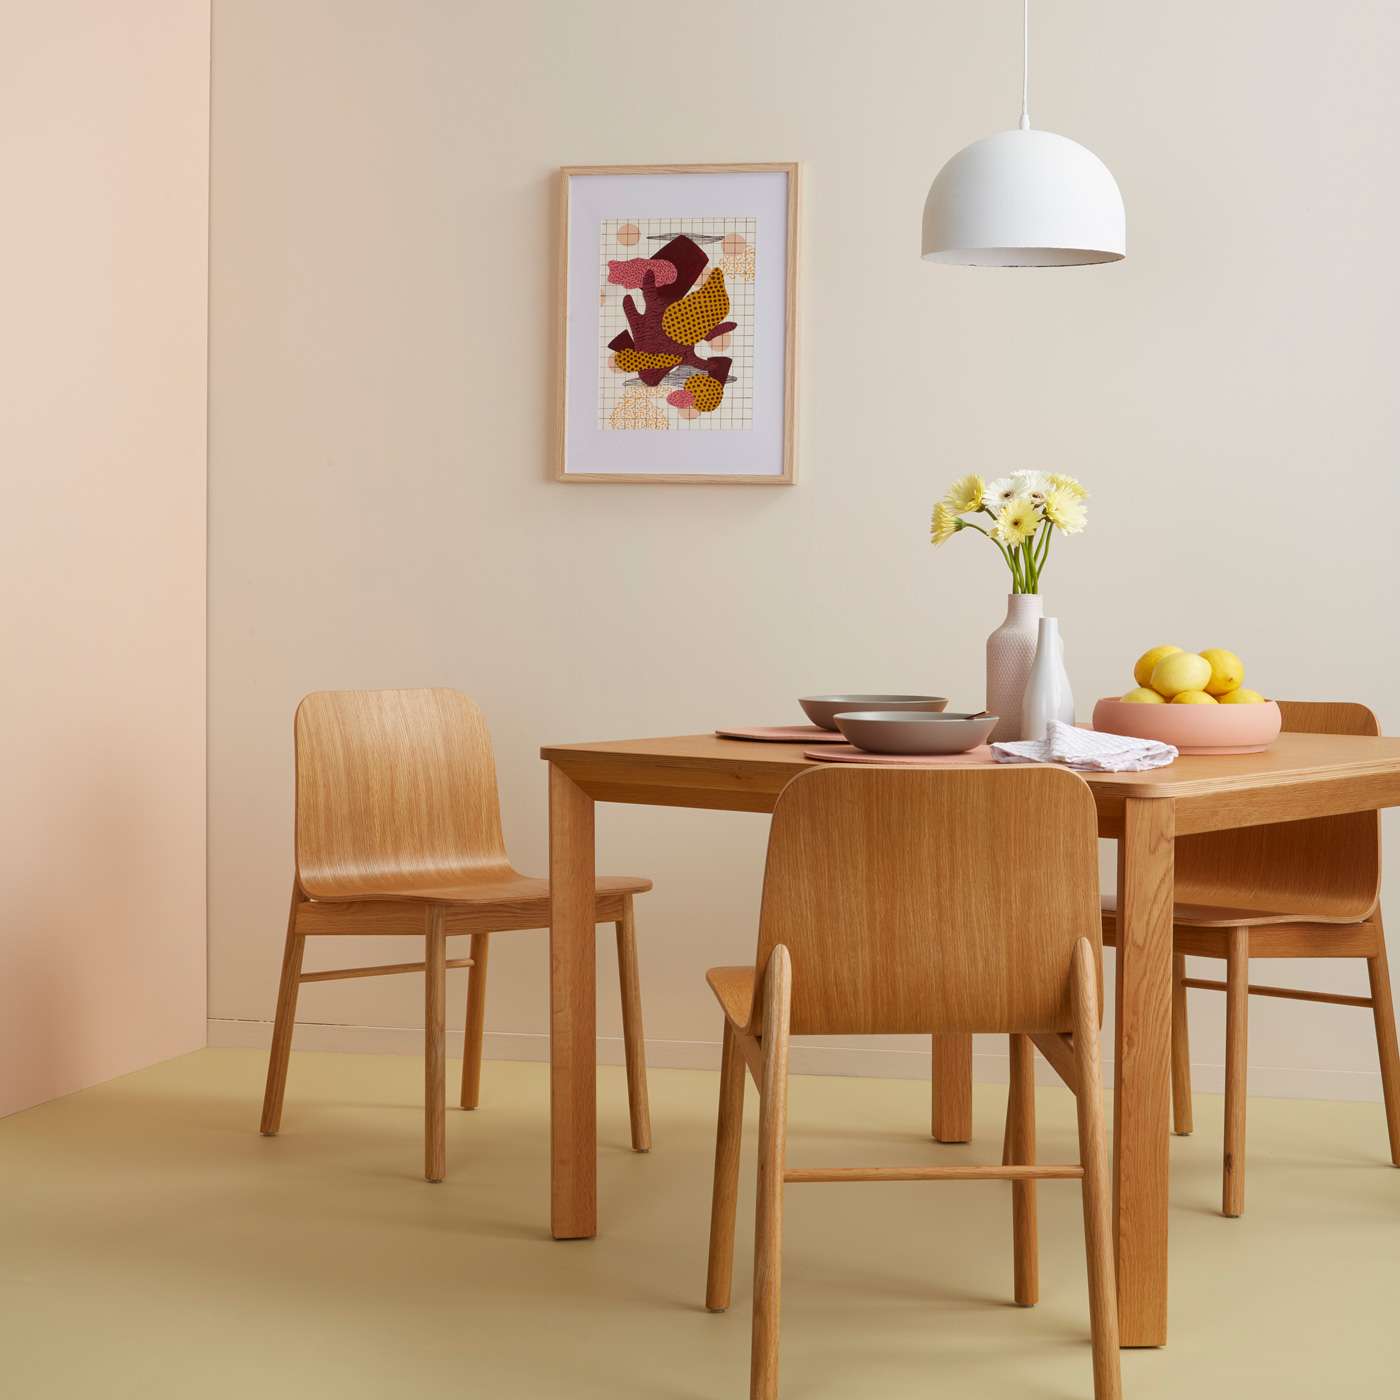
In this serene dining scene, the floor painted in Resene Walk-on tinted to Resene Yuma provides the perfect base for a palette of soft hues. The walls are in Resene Soulful (left) and Resene Despacito, the pendant light is in Resene Alabaster, the vases are in Resene Alabaster and Resene Ethereal, and the fruit bowl is in Resene Just Dance. The artwork was created using testpots of Resene Cleopatra, Resene Smoulder, Resene Love Me Do, Resene BFF and Resene Soulful. Project by Laura Lynn Johnston, image by Bryce Carleton.
Ceilings
If your walls are a neutral hue and your space has a high stud (which ensures the effect won’t feel oppressive), you might like to break away from the usual white and add colour to your ceiling. Interior designer Annick Larkin suggests using a moody tone like stark blue Resene Coast to create an intimate, cosy feel, or try something playful like bright Resene Malibu with sponged-on fluffy clouds in Resene Quarter Alabaster, or deep Resene Blue Night dotted with stars in glow-in-the-dark Resene FX Nightlight in a child’s room.
Before you begin, remove or cover any items that you don’t want splattered with paint, protect the floor with drop cloths and apply painter’s masking tape where the ceiling meets the walls. A new ceiling will require an undercoat, but if yours is already painted, you can skip the priming part and simply clean first then apply your chosen Resene SpaceCote Flat colour.

A mural painted on the back of the front door gives this home’s otherwise neutral entryway an injection of colour. The door is in Resene Double Alabaster, Resene Double Foundry, Resene Santa Fe, Resene Dust Storm and Resene Galliano. The wall is in Double Alabaster, and the coat rack and bench seat are in Resene Double Foundry. Project by Laura Lynn Johnston, image by Bryce Carleton.
Doors
A bit of creativity can turn nondescript interior doors into statement décor elements. If yours have an existing waterborne finish, simply clean with Resene Interior Paintwork Cleaner. Once dry, apply two coats of Resene Lustacryl semi-gloss in your chosen Resene colour or use Resen Enamacryl gloss waterborne enamel for a glossier finish.
Bookcases
Whether the backing is wood, particle board or MDF, Annick says “painting the inside back of your bookcase is a quick and easy way to a little merriment to your home”. Prep with a light sand and thorough clean. Use painter’s masking tape to ensure you keep paint off everything except the inside back of your bookcase before applying two coats of Resene SpaceCote Low Sheen in your choice of colour.
“If you feel like this is too big a job, try painting just the edges of the shelves instead,” says Annick. “You’ll still end up with a pop of colour, but it’ll take you much less time.”

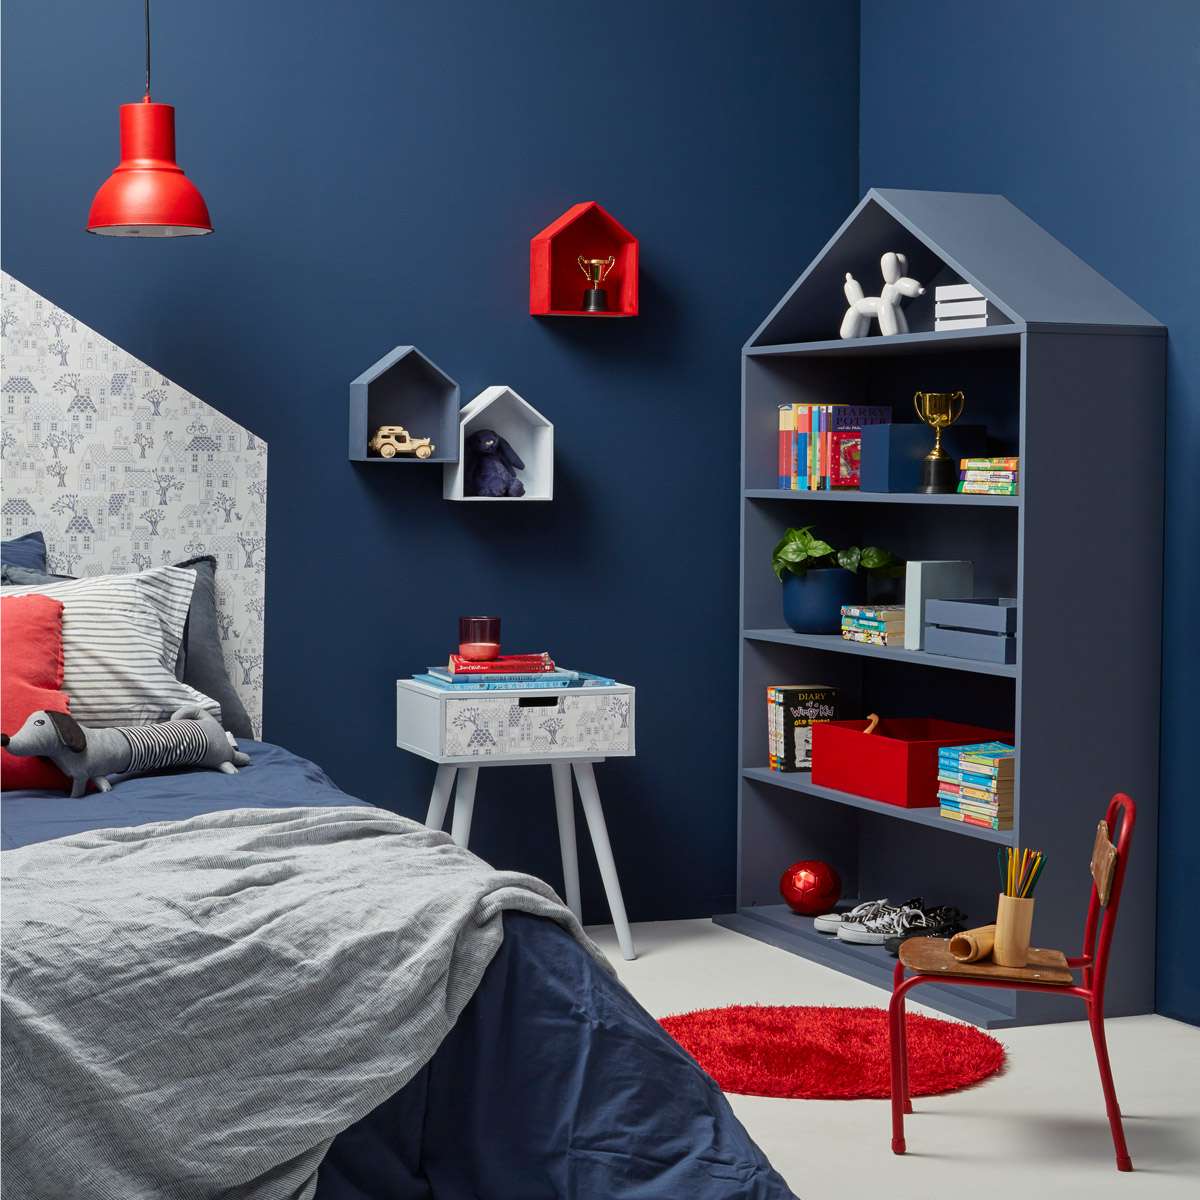
These house-shaped wall-hung shelves painted in (from top) Resene Jalapeno, Resene Hammerhead and Resene Breathless are playful and practical accessories that showcase a child’s prized possessions. The walls are in Resene Bunting, the floor is in Resene Sea Fog and the bookshelf is in Resene Hammerhead. The wallpaper ‘headboard’ and bedside drawer front were created using Resene Wallpaper LL-05-07-4. Project by Vanessa Nouwens, image by Bryce Carleton.
Hardware
Everyone knows you can give your kitchen and bathroom cabinets a new look with paint, but have you considered painting the handles? Unscrew them from your cabinets and drawers; give them a light sand to partially remove any varnish, create a non-slippery surface for the new paint to stick to and smooth any dings; then clean them thoroughly. For very smooth handles, apply Resene Waterborne Smooth Surface Sealer then, when dry, two coats of glossy Resene Lustacryl in your choice of colour – try inky blue-black Resene Nero for an on-trend look or Resene FX Metallic Rose Gold for a luxe one.
To get your cabinetry looking as good as your new handles, you can use a similar paint system. If you are painting over laminate, clean first, then apply Resene Waterborne Smooth Surface Sealer to help the topcoats grip. Then apply Resene Lustacryl semi-gloss waterborne enamel.

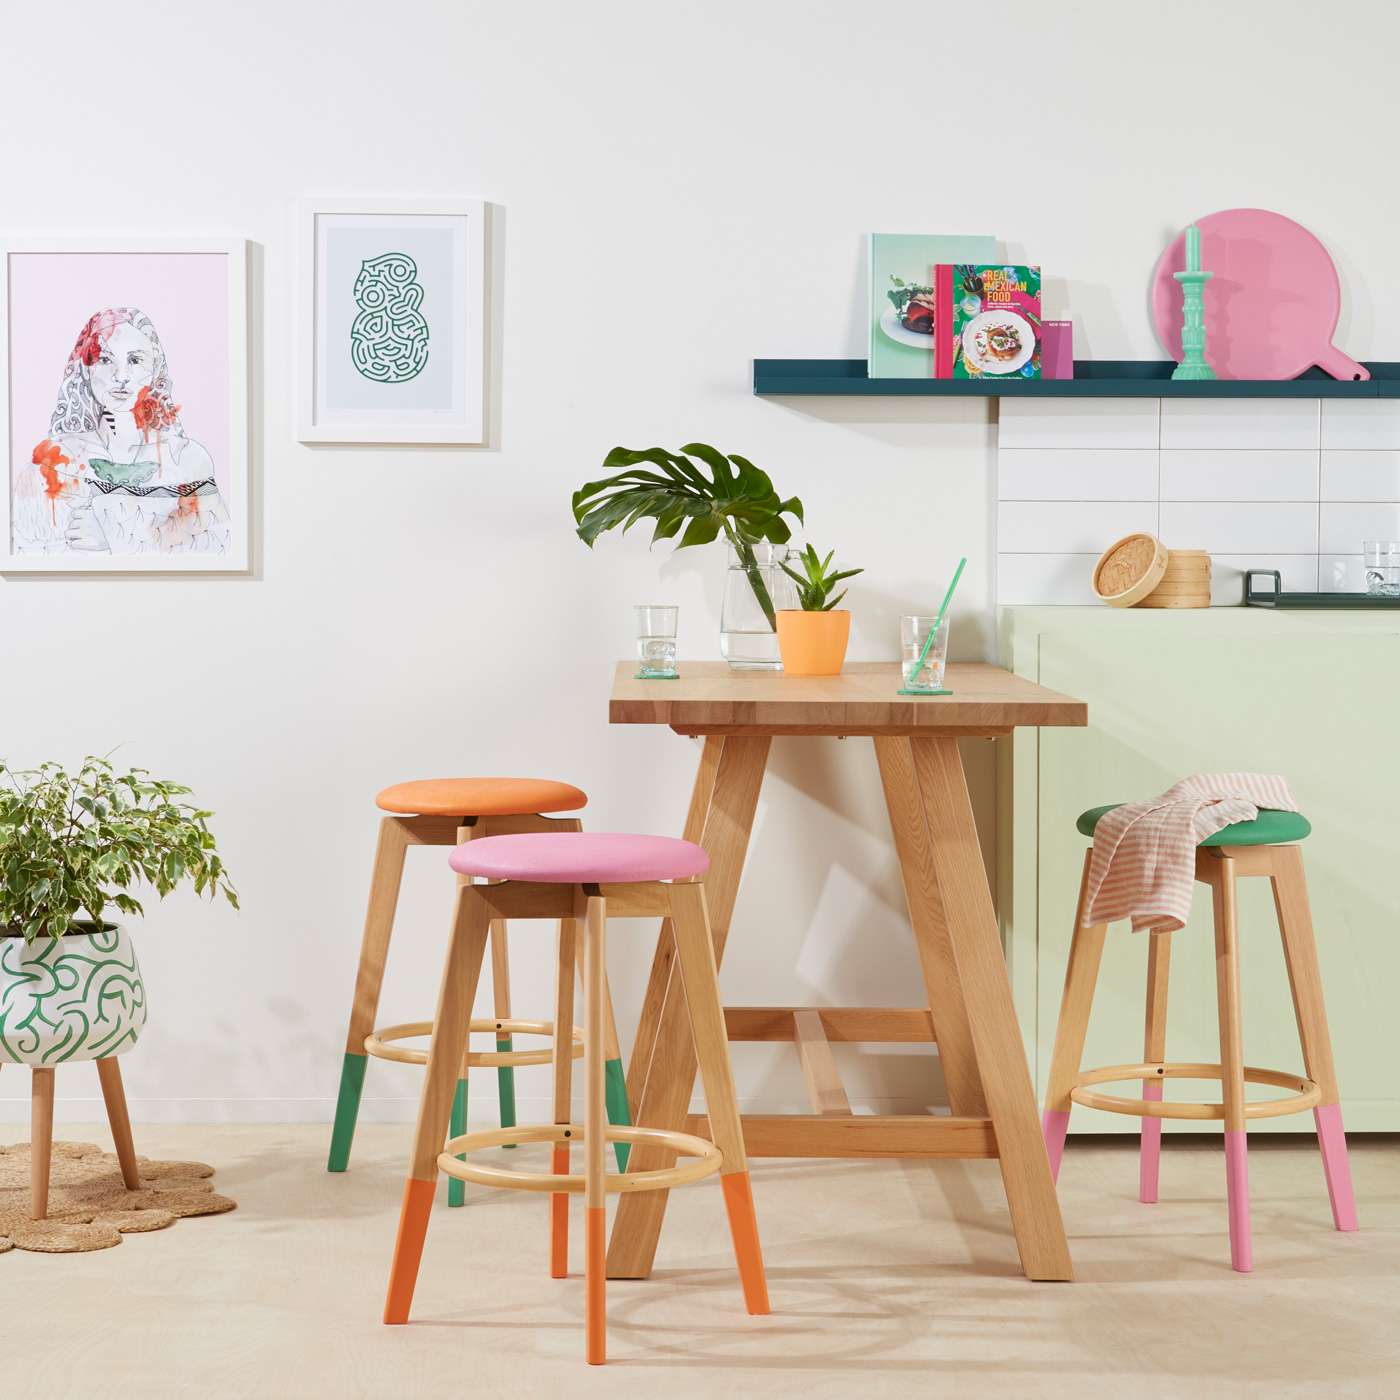
When it comes to colour, the cautious among us don’t need to go all in – a little can go a long way. A testpot each of Resene Away We Go, Resene XOXO and Resene Party Zone made these barstools look pretty nifty. The walls are in Resene Rice Cake, the shelf is in Resene Atlas, the chopping board is in Resene XOXO and the cabinetry is in Resene Aura. Project by Kate Alexander, image by Bryce Carleton.
Accessories
Perhaps the easiest way to add colour and personality to your home with paint, there’s a plethora of household products you can get creative with. Add colour to picture frames, vases, light switches and the legs of your furniture. Have fun with bright Resene testpot colours on the handles of wooden spoons, spatulas and chopping boards; apply Resene FX Blackboard Paint to herb pots and storage boxes so you can label them; or add patterns to bookends and baskets.
Inexpensive Resene testpots are perfect for giving a plain lampshade or lamp base a makeover. Consider applying a stencil or using painter’s tape to create a pattern. Simply protect the hardware and inside of the shade with painter’s tape, then go forth and create. With paper shades, take care not to add too much paint to your brush, or the shade may get wet and rip.
Take a look around your home, there are endless opportunities to update with paint. See the Resene project section online for easy step-by-step project ideas at www.resene.co.nz/projects then visit your Resene ColorShop for everything you need to get the job done.


